How to Use Lock?
The "Lock instance" option allows you to lock an instance to prevent any further actions or modifications on that instance. When an instance is locked, it becomes read-only, meaning you cannot perform any operations that could potentially modify its state or configuration.
Step 1
Log in to the xconnect portal. (opens in a new tab)
Step 2
Under the Project tab, open the Compute tab and click on Instances.
To lock a volume, click on the "More Options" arrow for the Instance you want to lock. This will provide additional actions specific to that Instance.
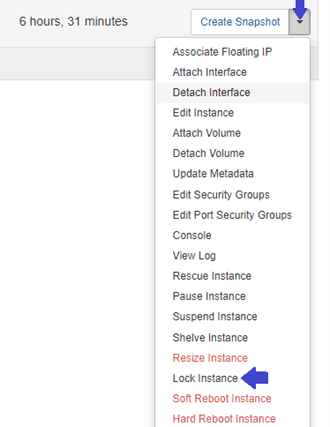
After locking the instance, a lock icon will be visible in the instance information.
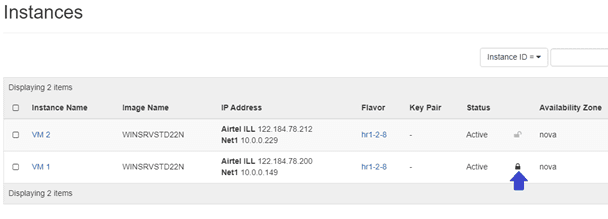
Applying a lock to an instance restricts several operations. You cannot change the instance's state (pause, suspend), resize its resources, perform live migrations, or attach or detach volumes. The lock keeps the instance in a read-only state, allowing access to logs and information, but no configuration or state changes until the lock is removed.